
Compare Anycubic Kobra 3 V2 Combo vs Nova3D Bene4
Comparison between the best 3D printers
Choose the best 3D printer at the best price. The cheapest 3D printers are here.
Buy a 3D printer here with 3D Fila.
 |
 |
|
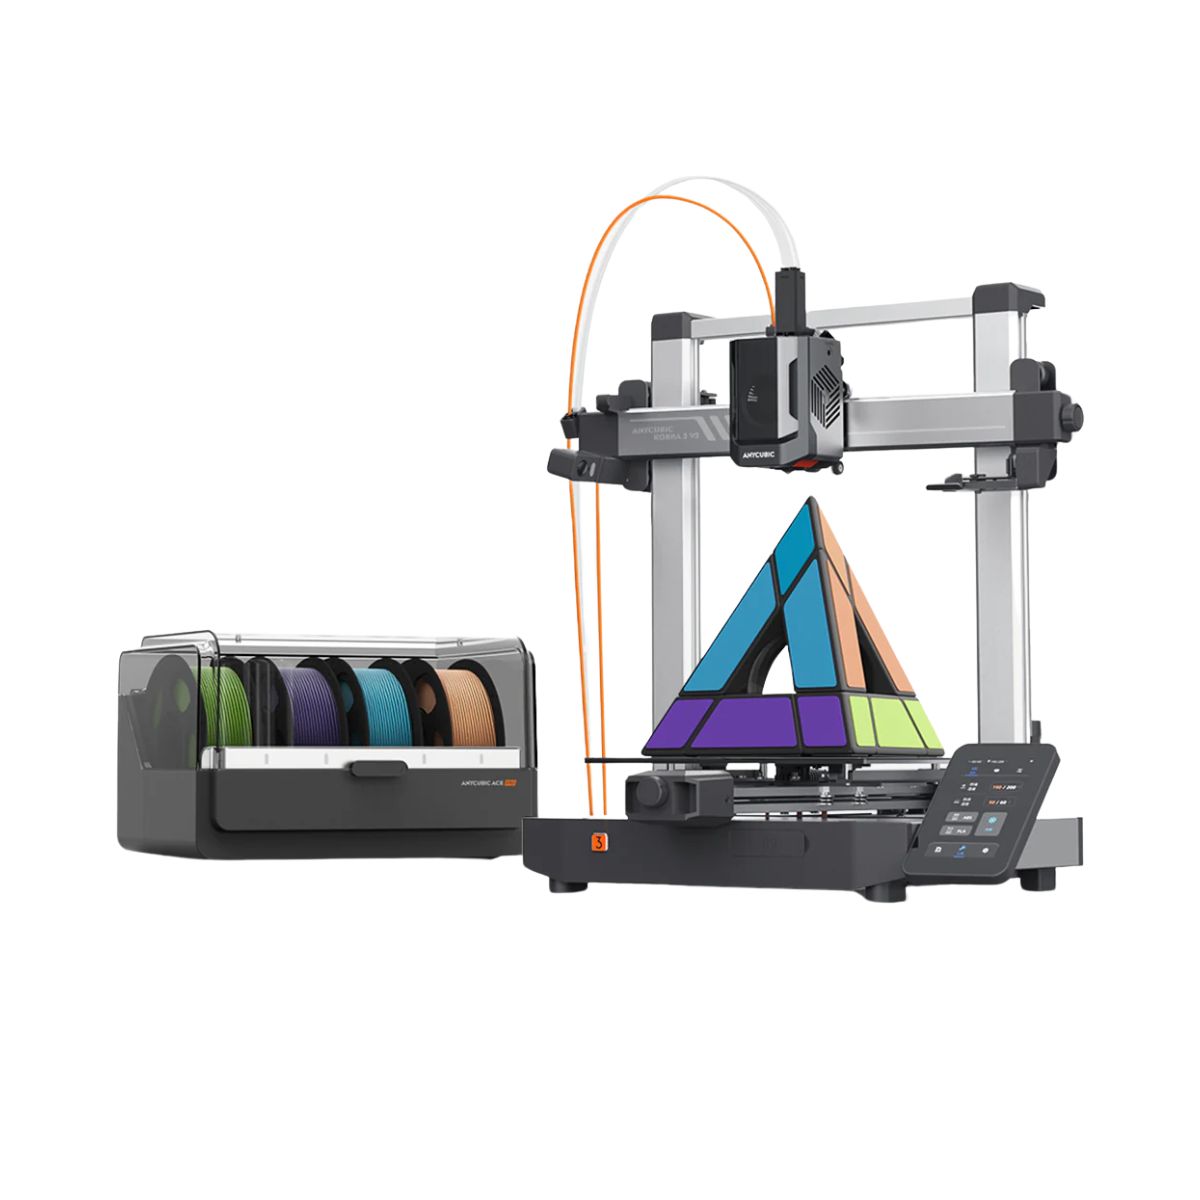
| Model | Anycubic Kobra 3 V2 Combo[BUY Kobra 3 V2 Combo] |
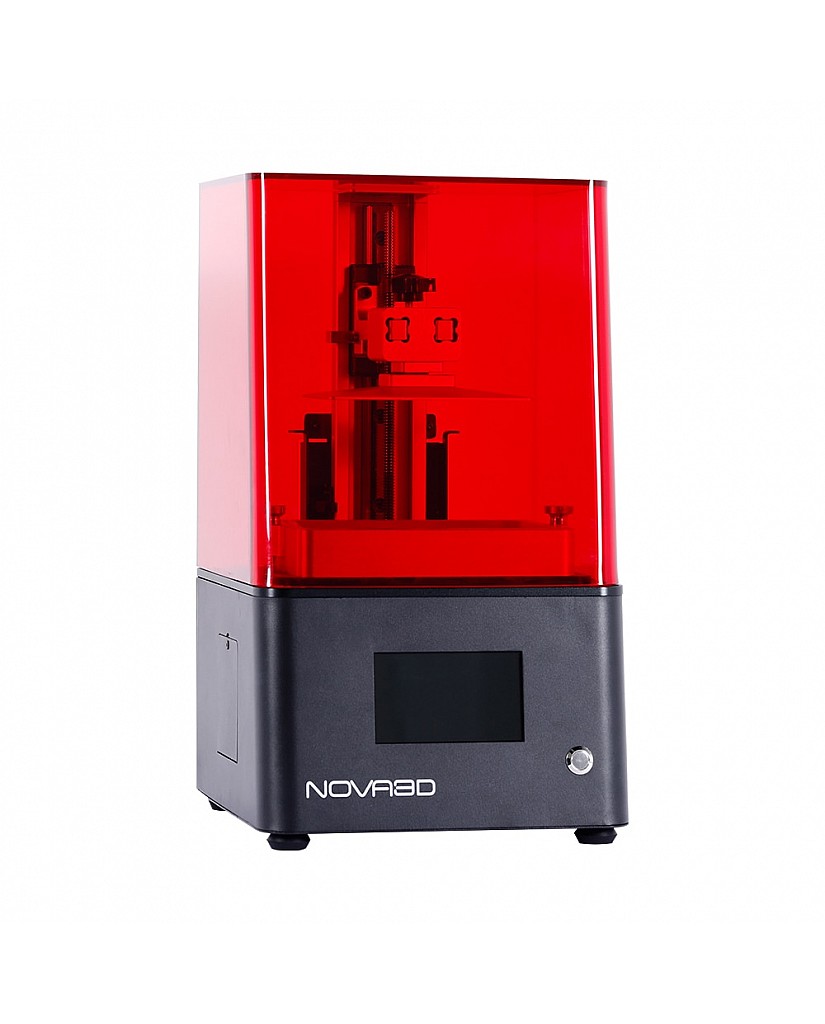
Nova3D Bene4 |
| Printing Material | Filament | Resin |
| Estimated price | $379,00 | $350,00 |
| Date of registration in the system | ||
| Manufacturer | Anycubic | Nova3D |
| Release Year | 2025 | 2021 |
| Print Volume [mm] | 255x255x260 | 80x150x130 |
| Printer Size [mm] | 452x504x483 | 240x240x430 |
| Weight [kg] | 9,37 | 9,5 |
| Power Loss Recovery | YES | NO |
| Maximum Resolution [mm] | 0,1 | 0,01 |
| Kinematics | - | - |
| Extruder Type | - | - |
| Klipper Firmware | NO | NO |
| Input Shaping | NO | NO |
| Max Volumetric Flow [mm³/s] | - | - |
| Power Supply | 400 W | |
| Connectivity | USB, Wi-Fi, Cloud | USB / Wi-Fi |
| Release date | 2025 | 2021 |
| Extra features | The Kobra 3 V2 Combo brings notable upgrades: a wider Y-axis and SG15 bearings on the X-axis for greater stability, a redesigned nozzle to prevent leakage, a larger build volume (255x255x260 mm), a built-in 720p camera, and native support for 4- or 8-color printing with no extra hub required. All of this combined with LeviQ 3.0 auto-leveling and integrated filament drying. | The Bene4 Mono Printer stands out for its 6.08-inch 2K monochrome display, which allows for faster curing times and longer lifespan. With print accuracy that rivals its competitors, it offers a factory-pre-leveled build plate, eliminating the need for manual adjustments. It has a hinged lid for easy access and reduced resin mess. The metal reservoir comes with useful features such as pouring aid and maximum level indication. In addition, it has Wi-Fi connectivity and a sleek design with a 4.3-inch touchscreen display. |
| Support for multiple colors and materials (AMS and CFS) | YES | NO |
Notes * |
||
| Cost-benefit | 8 / 10 | 7 / 10 |
| Hardware | 6.3 / 10 | 2 / 10 |
| Screen | . | . |
| Print volume | 10 / 10 | 10 / 10 |
| Performance | 10 / 10 | 5 / 10 |
| [BUY Kobra 3 V2 Combo] |
Conclusion |